

Microsoft Copilot Studio
Get your instance’s connection values from Connect a client → Copilot Studio in the console, or ask your administrator. See connection prerequisites and sign-in before starting.
These screenshots show the agent-building interface provided in September 2026. Available options can depend on your account and environment permissions.
1. Create or open an agent
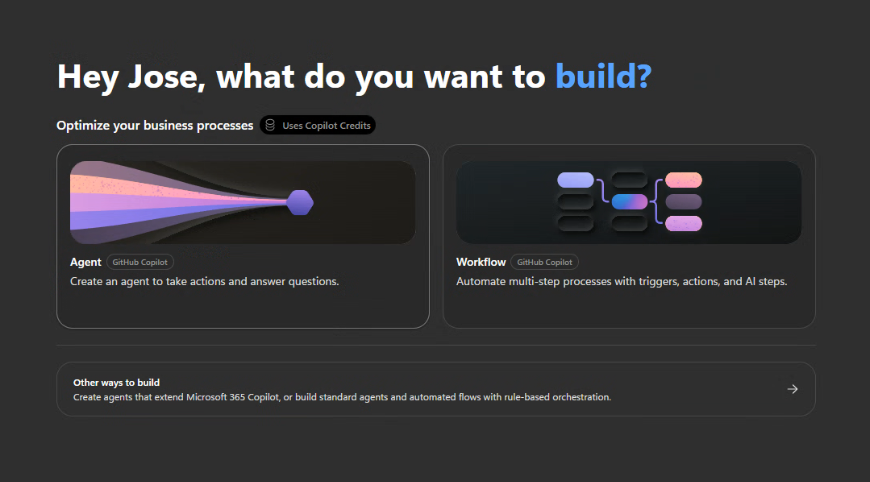
Section titled “1. Create or open an agent”Choose Agent on the start page, or open an existing agent.
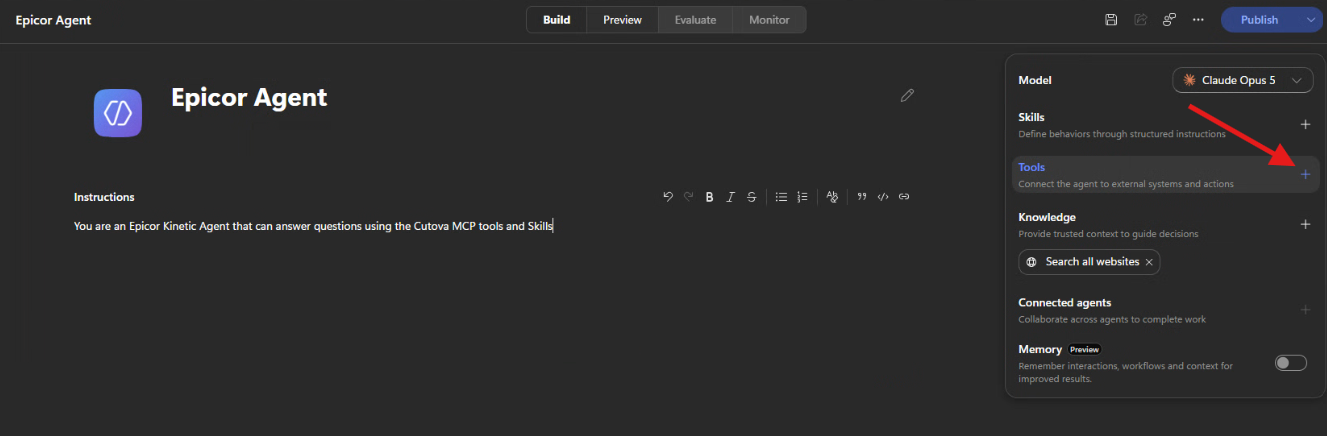
On the agent’s Build tab, click the + beside Tools.
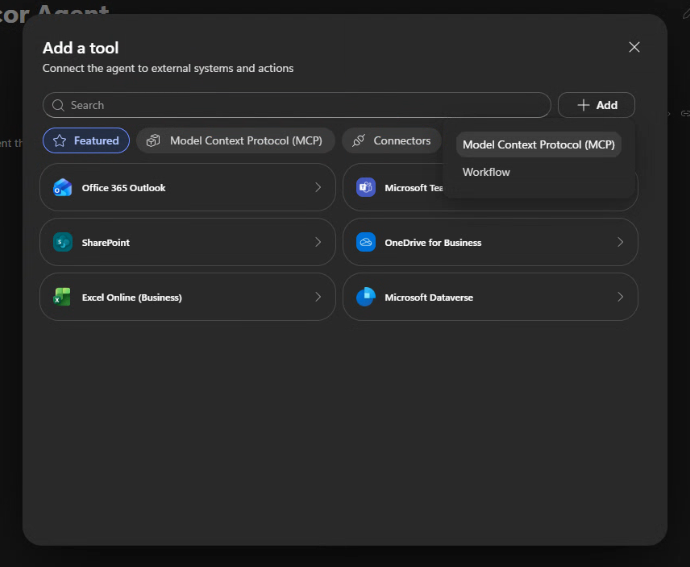
In Add a tool, choose + Add → Model Context Protocol (MCP).
2. Configure the MCP server
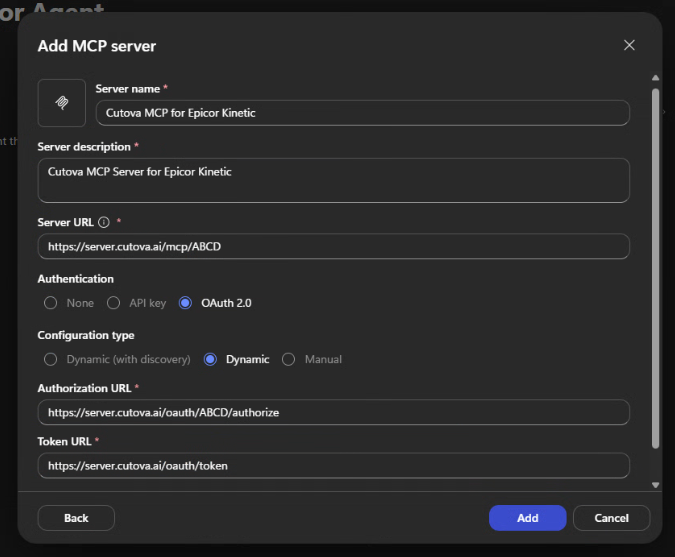
Section titled “2. Configure the MCP server”Enter a server name and description, then copy the connection values from your instance’s console page.
| Setting | Value |
|---|---|
| Server URL | Your instance’s MCP URL |
| Authentication | OAuth 2.0 |
| Configuration type | Dynamic |
| Authorization URL | Your instance’s path-based Authorization URL |
| Token URL | Your instance’s Token URL |
| Refresh URL, if requested | Same value as Token URL |
For example, the URL shapes are:
Server URL: https://server.cutova.ai/mcp/YOURQUICKCODEAuthorization URL: https://server.cutova.ai/oauth/YOURQUICKCODE/authorizeToken URL: https://server.cutova.ai/oauth/tokenUse the actual values from your console. ABCD in the screenshot and YOURQUICKCODE above are placeholders.
Choose Dynamic, as shown, rather than Dynamic (with discovery). The path-based Authorization URL carries the instance’s quick code through this client’s sign-in flow. Click Add.
3. Create a connection
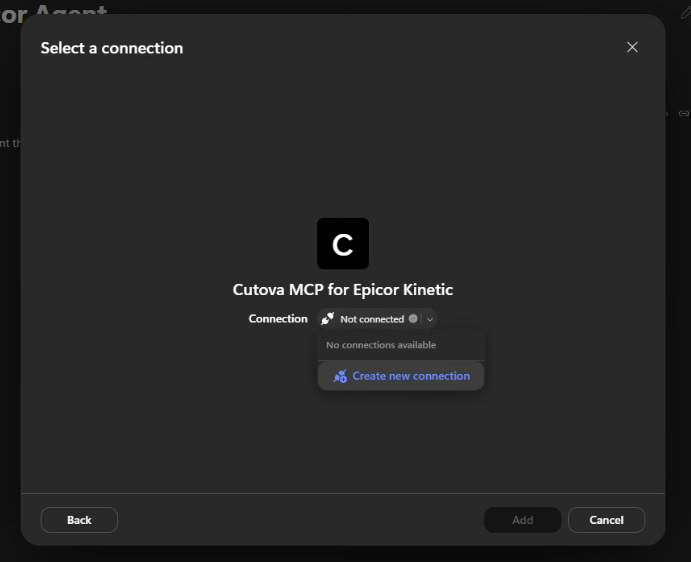
Section titled “3. Create a connection”In Select a connection, open the Connection dropdown and choose Create new connection.
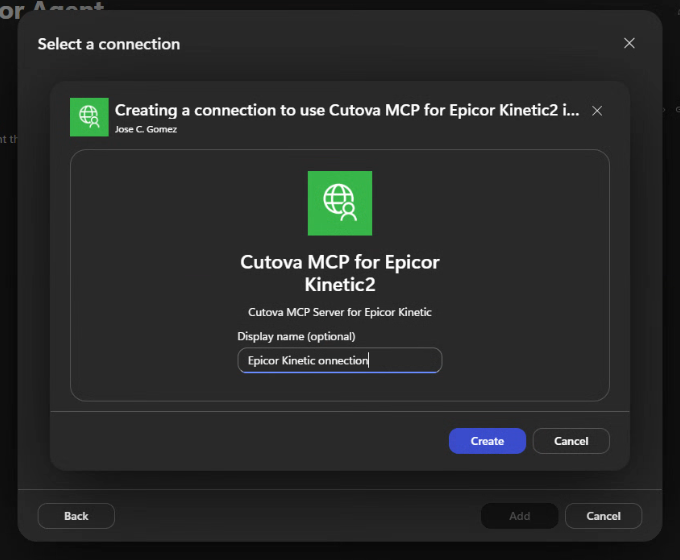
Optionally enter a display name such as Epicor Kinetic connection, then click Create.
4. Sign in to Epicor and approve access
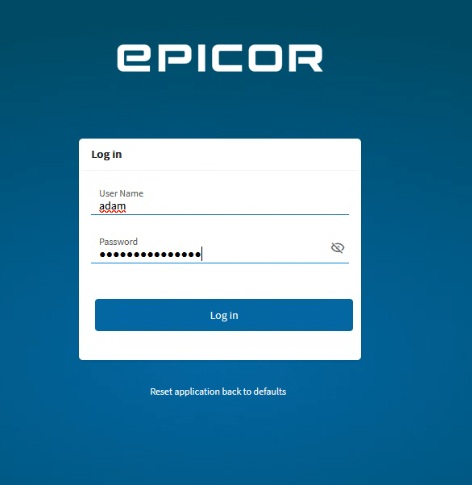
Section titled “4. Sign in to Epicor and approve access”The sign-in window takes you to your own Epicor environment first. Sign in using your normal account and sign-in method.
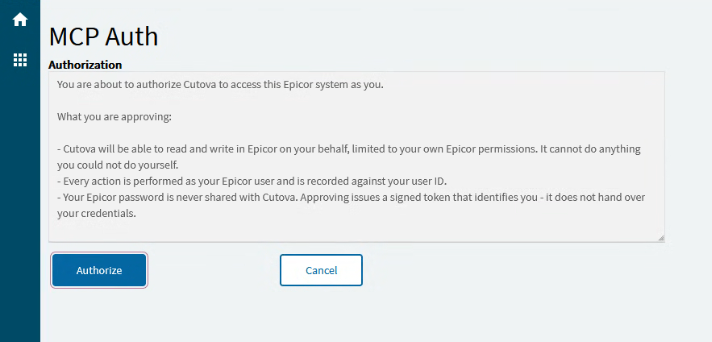
On the Epicor MCP Auth screen, review the notice and click Authorize.
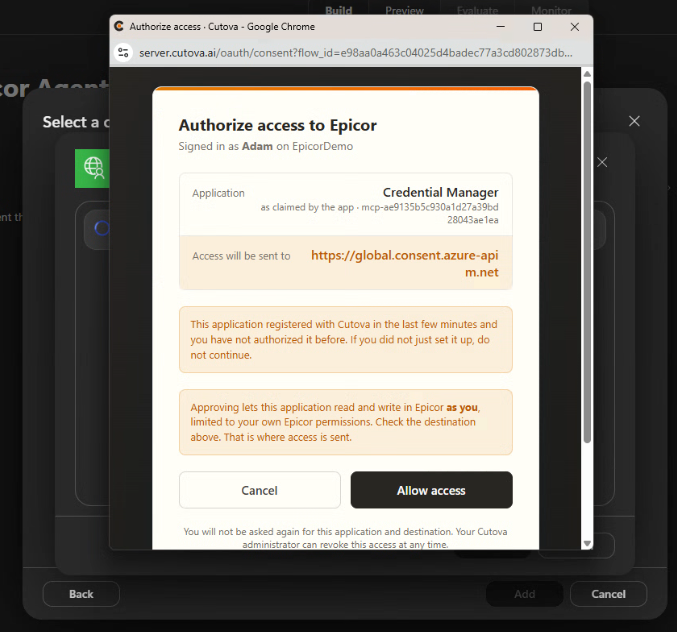
Cutova then shows Authorize access to Epicor. Check your signed-in user, environment, application and destination before selecting Allow access. In this Copilot Studio example, the application is labeled Credential Manager and the destination is https://global.consent.azure-apim.net. Approve only the connection you just initiated and recognize.
For Epicor Classic’s token-paste flow, see the shared sign-in guide.
5. Add the authorized connection to the agent
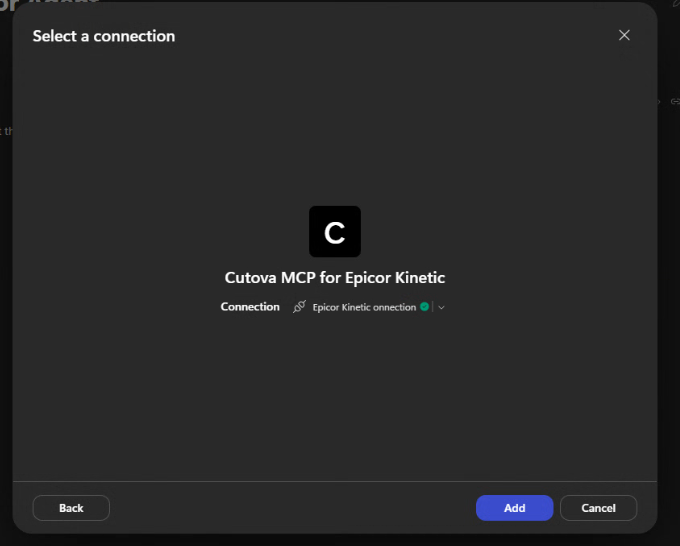
Section titled “5. Add the authorized connection to the agent”Back in Select a connection, confirm your connection has a green check and click Add.
Confirm Cutova appears under the agent’s Tools. The model selection shown in the screenshot is an example, not a required Cutova setting.
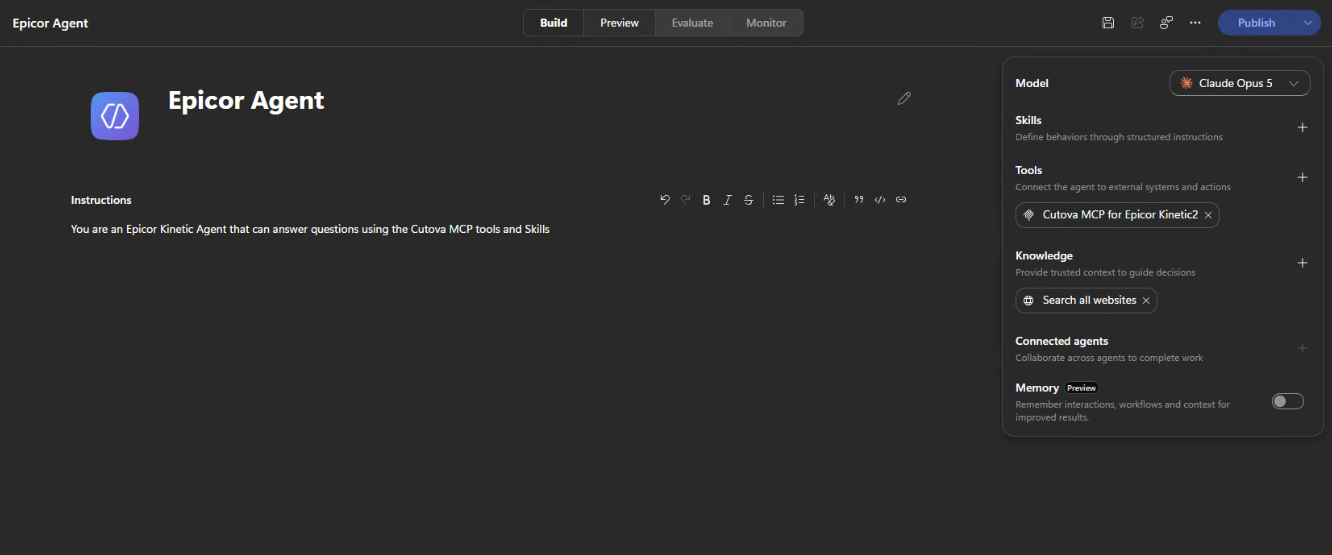
Use Preview to try a first tool call with a tool enabled for your instance. Verify a successful tool call before publishing your agent.
Epicor® and Kinetic® are trademarks of Epicor Software Corporation. Cutova is an independent product and is not affiliated with, endorsed by, or sponsored by Epicor Software Corporation.
Cutova, a product of Lens Software LLC